Wednesday, January 9, 2013

Soccer Card

I whipped up a card tonight for a friend at work that needed to send a Thank You note for a Christmas gift they received. She told me the card recipients LOVE soccer so I decided I was going to make that theme. My excitement with making this card was being able to use my new craft desk since I've done my craft room makeover! I had the Cricut going in the corner while I was gluing and embossing the card details. I was in a zone and my new room layout is perfect for me. 

I also went through and pulled out my Valentine's Day paper and embellies and I'm excited to start on those crafts next. 

Enjoy the card pics! 


  • Card is a little over 5 1/2 x 5 1/2
  • Grass and Soccer Ball- Sports Mania Cricut Cartridge
  • "You Rock" Wording- Alphabet Cricut Cartridge
  • Star Punch with a copper embossing powder and a white button for details
  • White, Black, Orange, Yellow, and 2 shades of Green cardstock and 1 printed green paper 
  • Rounded the edges with punch

Monday, January 7, 2013

My Closet Makeover!

Now I know it's only January but I think I am going to start working on some Valentine's Day crafts. I've seen so many cute ones on Pinterest and want to enjoy them for more than a week (which is typically the time I put them up.) Nothing special here at my casa with Valentine's Day but I think the fun crafts I have in mind would brighten my days around such a holiday. Stay tuned for some DIY Valentine's Crafts in the coming week.

In the meantime- I wanted to post some pictures of a HUGE accomplishment I did back over the Labor Day weekend last year. When Chris moved there was a rather large whole in my closet and not admitting to myself that he was gone I just filled the whole with my clothes and didn't care about where anything went. That's completely not me (when it comes to my home) and would shame my 5 years of blood, sweat, and tears working retail and the constant drive I had to keep my store perfect. With that being said, since I had the time, I decided I was going to give my closet a makeover. I had hanging clothes everywhere. Shoes were tossed in the bottom floor. Bags and purses just thrown on the top shelf and not organized. And my T-shirts were folded on the shelf of a bookcase that was just taking up too much room. Finally, I can't even begin to explain the chaos my jewelry was in. I love my jewelry but I didn't know what I had anymore.

My first task was to get rid of the large 5 shelf bookcase and replace with with a 3 shelf that I had in my study at the time. As you can see in the previous post, that 5 shelf is now a white bookcase (after painting) and fits perfectly in my new study providing the space and storage it's meant to give. Once I moved the smaller shelf in, I knew I had to condense the items on the shelves and walls. Though the closet is large and spacious it only had 2 bars- one short and one very long one. So I decided to add a second bar on the shorter end of the closet, lower the bottom bar, and raise the top shelf. This made it perfect for all my t-shirts and the bottom bar holding jeans, pants, and tanks. The very, very top shelf, I just have some special shirts folded as I don't plan on wearing them. The other bar in the closet was now open for me to spread out the blouses and dresses I have and organize them by sleeve lengths and colors. Sounds OCD- but really it's what I was used to while working retail and still find many habits of color coding everything these days.

As far as the shoes, I got rid of the large door shoe holder that was on the wall and got two shoe racks  for the floor. My other heels (the ones I typically wear at work and the most of) found a place on the new bookcase. The biggest change was the jewelry. I had already all these jewelry organizing cases handing on the bars of the closet but you can see I never used them. Well I decided to put them to use now. All my earings, bracelets, watches, pins, and matching necklaces are all organized.  In addition, I bought a cork board at Walmart for $5.00 so I can hang the majority of my necklaces so I can see them. 

I am proud say it's been about 5 months- and the closet is still neat and still organized. Only thing I've added (with the exception of new clothes) is some girly pictures and an Ikea bending mirror that I use as I match my jewelry with my outfit.  I love it! I enjoy going into my closet and being able to move around and know where everything is at! It's my own personal dressing room. :)

THE BEFORE:  (UGH...)
Clearly you can see I just threw my purses and bags on the top shelf and just hung clothes where ever there was a spot.
This divider was suppose to serve a purpose :)
I just gave up folding since I knew I was going to have to re-do this. And all my jewelry... there are no words.
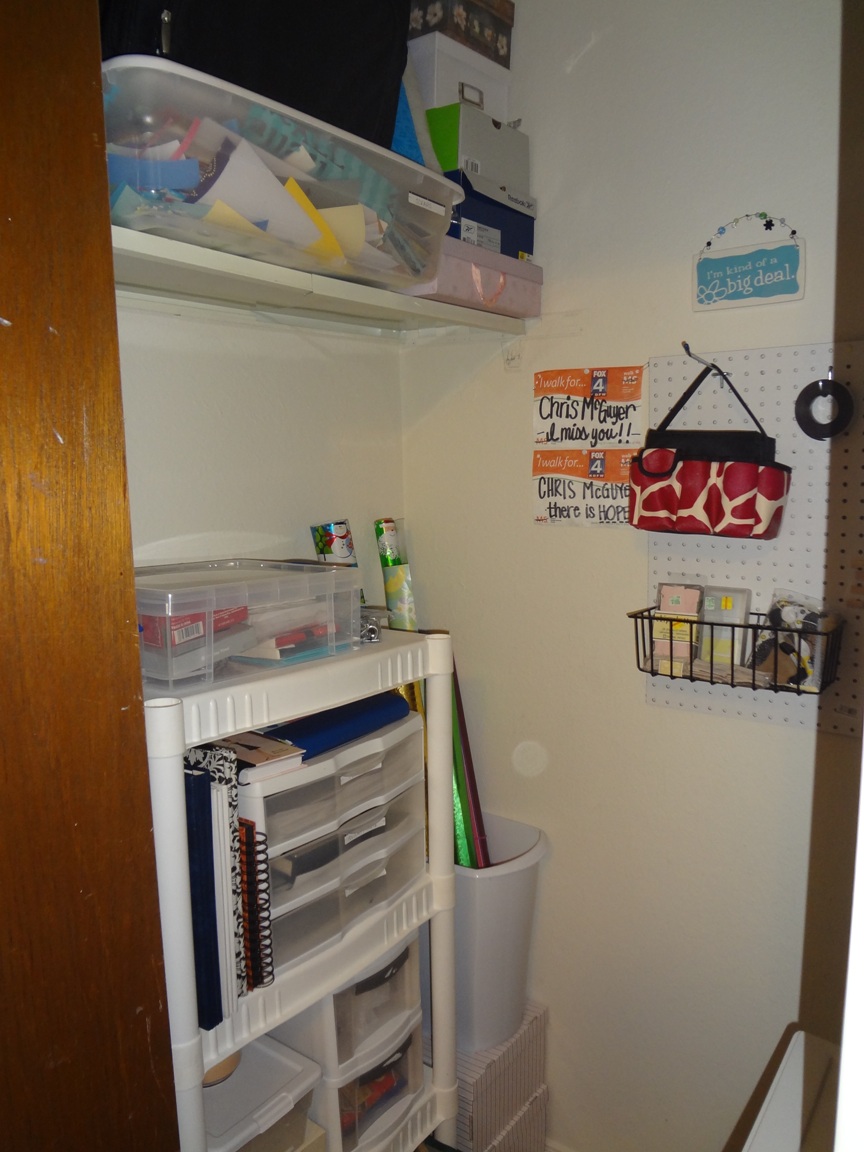
As you can see, the closet is pretty deep and spacious but still was no help if not organized. 


THE AFTER:
The second bar made a HUGE difference and all those unfolded shirts went back to being hung.
So much better!
Took awhile to go through all the jewelry but the pay off was so great!
Shoes are organized and my divider now serves a purpose for clutch purses, hats, travel make up bags, etc.

MY ADDED CUTE THINGS:
"Shopping is cheaper than therapy"

"Exercise? I thought you said Accessorize!"


Friday, January 4, 2013

My New Craft Room/Office

Here is it everyone! I have finally turned my office into a craft room/study and I want to share my pictures. I've been wanting to for a while but always found an excuse not to or just had lack of time. It got to the point where I found myself (and raise your hand if this is you):
  • Not knowing my full inventory of scrapbook stuff and always buying duplicates. 
  • Finding waisted space in my drawers or closets and never completely organizing everything. 
  • Going away on a scrapbook retreat and bringing almost everything I had because I didn't know what I had. 
  • Not being able to complete the crafts/cards/albums I wanted to because I had no counter space or no room.
  • And never being able to proudly display all my crafts I had made thus far because well- they didn't match anything. 
Reality was- I had tons of room! I just had the wrong furniture and so the vision began. It started with me finding an old office desk at a church garage sale for $25.00! It was perfect. It was long, it had 4 drawers, and was at the perfect height. That same place also had a wooden stool which fits great in the "chair" spot under the desk. Problem was- once I got it in the room (and you will see in the pictures) I had NO space and something had to be done. My best bet was to get rid of the large pull out desk armoire and buy a smaller desk to just hold my computer and printer. All my craft stuff would be organized in the other desk and I would model my closet and really bring out the use of my bookcase and shelving.

So- Bought some wine, I splashed some paint on the walls, brighten the room up with a choice of pastels and some bold colors, painted all my brown furniture white, moved around furniture, completely re-organizing my whole office and closet with the new use of shelving and hardware and you will find my new Craft Room/Study! Side note- I want to thank my friend Judy for helping me paint and move furniture! No way I would have been able to move this stuff around- especially the loveseat which also is a sleeper!

BEFORE: 
After the craft desk was bought it was clear that this room was super crowded!
Plain white walls gave me no inspiration!
Just not the focal point I was going for!
This large desk was taking up all the room!
I had no spot for my Cricut which just sat in a box. :( And non of these boxes with the exception of the bottom ones were even being used!

THE LABOR:
Because this is how you paint a whole room!
These were too large to move. So plastic tarp became my friend!
Slowly but surely the paint was getting up on the walls!
A couple coats of primer and white paint!

AFTER:
Now this will bring me some inspiration!
Kept the framing but just moved it to the opposite wall. This is my new desk from Ikea!
My Cricut in the corner sitting nicely on my storage unit next to the craft wall. Perfect for cutting while I'm at the desk.
That's a cork board I made with cork roll and a poster frame  then I had a cork picture frame that I painted and centered on the larger board. (On sale at Walmart for a $1.00- now I just need to add a picture.)  Underneath is a metal board for magnets and I have my ribbon scraps in metal magnet containers! Eventually stuff I'm working on will be displayed.
Now that's what I call a focal point! ....No that's not my dog- just a pillow!  :)
So much more space adding a peg board! Only $9.00 from Home Depot.
I have a new space for the Big Kick Embosser I want!
Yes- I made these paintings!  :)

RE-ORGANIZED CLOSET:
Ah- yes- I have it back to a walk in closet!
My photo boxes, scraps box, and storage tote on top self, with more organized items on the bottom.
The other side with a designated "wrapping station" with tissue,  gift boxes, and gift sacks all on top shelf.


Well there you have it! My new room! Took a couple weekends because I work during the week but I knew my vision in mind would have a great payoff! If you have any questions on certain items and where I got them, let me know. I tried re-using a lot of the stuff I already had but I remember for the most part where everything came from. My forte is decorating on a budget. I am all about refurbishing something, organizing and labeling, and finding the best deals out there!

Thursday, January 3, 2013

Sneak Peak!

Well as you can see I've added to the page with some designs and pictures to make the blog more "me." It's coming along but there is still so much more to learn with creating a blog. I bet I have tried adding a Facebook "share" button 20 times and still had no luck. Might need to get some help on that one!

I did want to post pictures of my new study/craft room this evening but I haven't had time to upload all the pics since I was working on decorating my page. With that said, I do want to provide a sneak peak of a Before and After image! I've blurred it for the anticipation of the final revealing- so no your eyes are not going crazy! Stay tuned till tomorrow evening when I upload the rest of the newly painted and decorated room! 


Wednesday, January 2, 2013

Welcome Friends and Family!

Well this is my FIRST official post for Craft, Scrap, and Love On! I've been wanting to start a blog for a while now and since the new year has arrived, I figured why not now. My goal in mind for the blog is to have a spot where I can keep and share an online portfolio of the crafts and hands on projects that I do. You'll see I have a true passion for DIY projects and I love, love, love learning and trying something new. But then I thought, I really enjoy talking and telling others about my life and all the blessings God has given me. I strive to be a positive person with an upbeat and motivating attitude and wanted to create a ME zone that will  hopefully bring a little inspiration to others. My life is not perfect in any way and I have my fair share of ups and downs...but I wanted to invite you to join my journey in life and enjoy my new blog of a little Crafting, Scraping, and learning to Love On!